How to Download Pictures From Iphone to Mac Laptop
iPhones come with gigabytes of storage space at present. It can also deftly handle many image editing tasks you lot throw it. But there will come a time when you might desire to transfer photos from the iPhone to the Mac and edit them on more than powerful software. Sending a few photos as e-mail attachments might be simple, but there are more than straightforward means to export your iPhone photos to the Mac.
This article shows you how to transfer photos from iPhone to a Mac.
1. Utilise Airdrop
The secret to productivity on Apple devices is the tight integration between an iPhone (or an iPad) and a Mac. AirDrop is Apple's proprietary technology to apace transfer files between Apple devices when both are within range (nearly 30 anxiety). Plough on Wi-Fi and Bluetooth on both the iPhone and the Mac before you follow the steps below.
- Open the Photos app on your iPhone.
- Select the photos y'all want to transfer to the estimator. Tap the Share icon at the bottom of the screen.
- Select AirDrop which is the first icon on the Share menu.
- Choose your reckoner's name.
- The iPhone confirms a successful transfer with a Sent message below your reckoner's name.
Annotation: To automatically save the photos, you should take both the iPhone and the Mac estimator logged into the same iCloud account. If not, you will need to click Save when the file arrives on your computer.
two. Utilize Photos
The Photos app on both your iPhone and Mac is the central location for all photos and videos. That'southward why the app is the most organized way to transfer photos from your iPhone to your Mac.
- Connect the iPhone to your Mac with a USB cable and open the Photos app.
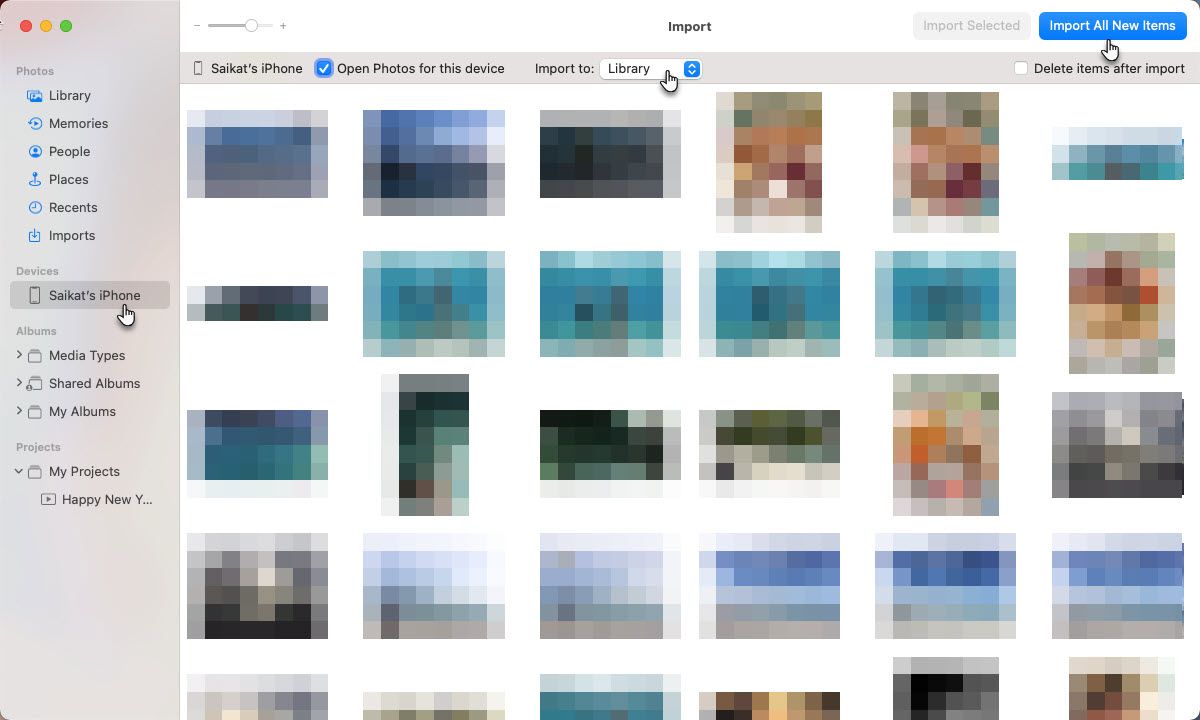
- The Photos app on the Mac displays an Import screen with all the photos and videos that are on the Photos app of your iPhone. Select the iPhone name in the Photos sidebar if the Import screen doesn't appear.
- Unlock your iPhone.The iPhone can brandish a Trust This Computer notification. Tap Trust to keep.
- Click Import Selected to transfer specific photos or click Import All New Photos to transfer your unabridged Camera Roll.
3. Use the Files App
Retrieve of the Files app as a file manager on your phone. You tin can connect cloud services like Dropbox, Google Bulldoze, and Microsoft OneDrive and use them to transfer files between devices. This utility allows you to organize your photo transfers, compress them if needed, and transport them to the Mac using any cloud service as a bridge. Yous must connect and enable them commencement.
- Open the Files app on your iPhone.
- Tap on the Browse tab if you are on some other screen.
- Tap the ellipsis icon on the upper right corner.
- Tap Edit.
- Under Locations, toggle and enable the third-party service or app from the list.
- Tap Done.
To get photos off the iPhone to the Mac, apply these Locations on the Files app.
Transport Photos via the Files App
- Select the photo or photos you lot want to transfer from your iPhone.
- Tap on the Share icon to brandish the share sheet.
- Select Save to Files.
- Cull the deject service and the folder within it to relieve the photos. Create a new folder if you want to. You can rename a single photograph before you lot consign it.
- Tap on Save.
- Go to your Mac and view your photograph or video in iCloud Drive.
As y'all can run across, you don't simply have to use iCloud with the Files app. It can also exist a quicker way to send photos to a shared folder betwixt friends and family unit on the cloud and even back up your iPhone photos.
4. Employ iCloud Photos
With iCloud Photos, y'all can sync and see all your photos across every Apple device you own. The only trouble is the gratuitous but limited 5 GB storage which is shared by all files on iCloud. As iCloud is a backup and syncing service, it'southward easy to transfer photos from the iPhone to the Mac. Before you lot do that, check that all your devices have iCloud Photos enabled.
- Open Settings on your iPhone.
- Scroll downwardly and tap on Photos.
- Toggle the switch for iCloud Photos to green if it's disabled.
- Launch the Photos app on your Mac.
- Open Photos on your Mac.
- Go to Photos > Preferences from the menu.
- Click on the iCloud
- Select the checkbox on iCloud Photos to enable it.
Use this official Apple Support video to see how to download photos from iCloud Photos to your Mac. You accept the choice to download them as they were taken or download them with any edits you made.
5. Use iCloud Photo Stream
Confused between iCloud Photos and iCloud Photo Stream? You aren't alone. iCloud Photos allows you to store all your photos and videos on the cloud. iCloud Photograph Stream uploads only new photos (and non videos and Live Photos) on devices where iCloud Photo Stream is turned on. It stores only the recent 30 days' worth of photos and up to 1000 photos. This isn't counted against your iCloud storage limits.
If you want to run across only your most contempo photos and transfer them to the Mac, use iCloud Photograph Stream and turn it on. Otherwise, use iCloud Photos to back up all your photos and videos every bit explained in the previous section. There are other differences as mentioned in the Apple Support article.
- Open the Settings app on the iPhone and tap our name on summit.
- Go to iCloud > Photos.
- Enable My Photo Stream with the toggle switch.
- Go to your Mac and open Photos
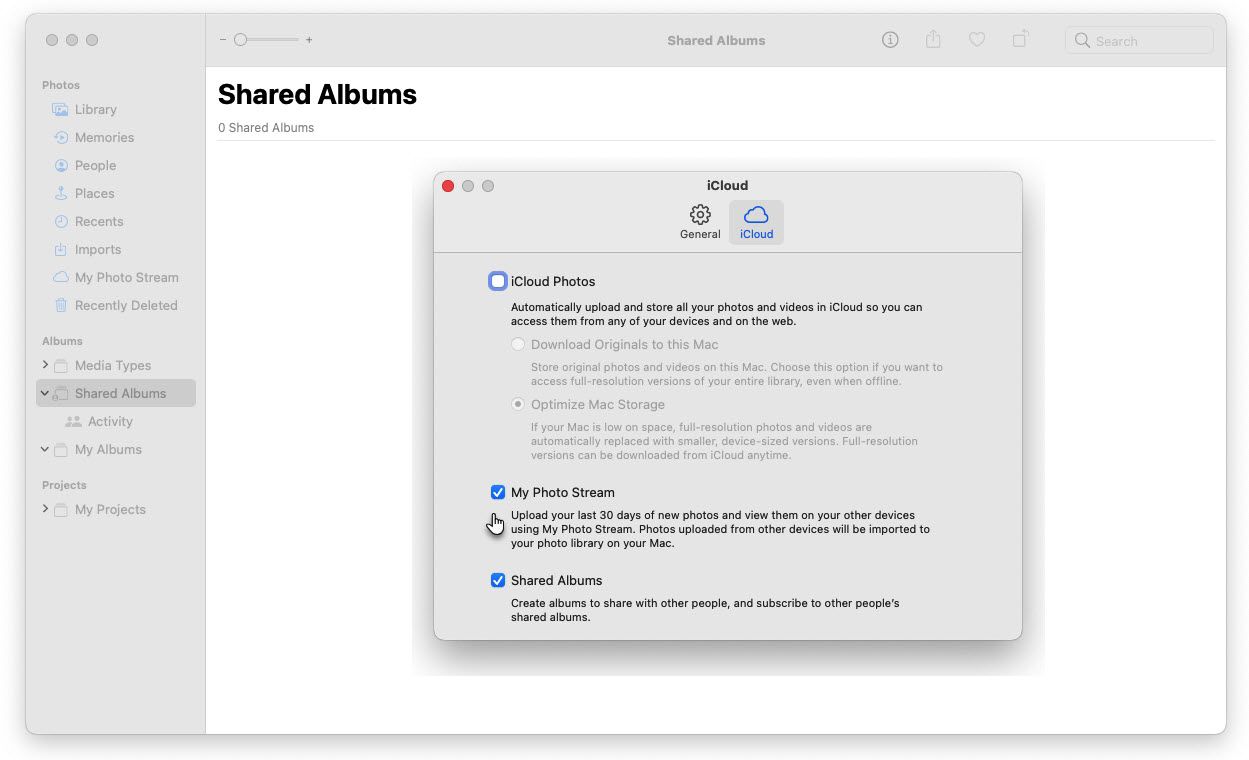
- Cull Photos >Preferences > iCloud
- Select the checkbox for My Photo Stream to enable it.
Photos will automatically sync to the photo stream from your iPhone. If you lot don't run across the selection, deselect iCloud Photos by going to Photos > Preferences > iCloud first.
6. Use Epitome Capture on Your Mac
The Image Capture app on macOS is intended to import pictures from digital cameras and scanners. But it can also be used to upload photos and videos from whatsoever other device like an iPhone connected to the Mac.
- Connect the iPhone to the Mac with the cable and unlock the iPhone when prompted.
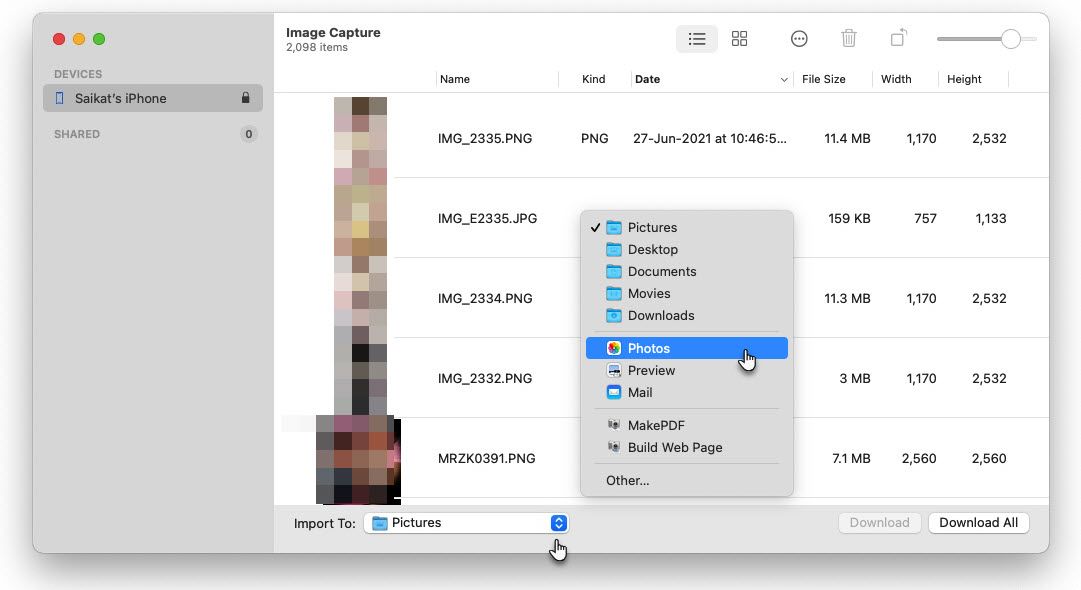
- In the Paradigm Capture app on your Mac, select the device in the Devices or Shared list.
- Select the images you desire to transfer to the Mac.
- Open the Import To pop-upwardly menu at the bottom of the window, then cull where to relieve the images. You can besides create a PDF or a webpage with these images.
- To transfer images to Photos, choose Other, then Photos.
Seamlessly Transfer Your Photos From iPhone to Mac
Keeping your precious photos on the Mac saves space on your iPhone. You may not accept to buy more iCloud storage space if you don't want to. As yous tin see, there are multiple options to import your photos into the Mac. In one case you have done that, go down to the job of managing your Photos Library on the Mac before it turns into a mess.
About The Author